


Posted by Camp Director | 12.20.2019 | Conservation, Karen Beasley Sea Turtle Hospital, Marine Science, Scuba Diving, Sea Turtle Camp, Sea Turtle Camp News, Turtle Talk
DIY Beeswax Wraps to Save Food Sustainably
As the holidays are approaching, so are the beautiful holiday dishes and resulting excess of food. If you’re looking for a more sustainable way to save that food, look no further. Our own Sea Turtle Camp Counselor Carrie Zamonski shares her beeswax wrap secrets to store in style.
Why should I use a reusable beeswax wrap?
Reusable beeswax wraps are meant to replace plastic wraps, aluminum foil, and other single-use products to contain your food. Scientific research has shown that plastic releases a variety of chemicals when it breaks down in a landfill or as litter in terrestrial and aquatic environments (Royer, Ferrón, Wilson, & Karl, 2018). Aluminum might seem more eco-friendly than plastic but research has shown that this material has a heavy manufacturing footprint and it can also leach toxins into the environment (Rastogi, 2010). Beeswax wraps are a great alternative because they can be used multiple times and the ingredients all can be found from the environment! By wrapping our sandwiches in beeswax wraps, we can reduce our impact on the environment by keeping plastic and other materials out of the landfill and out of the ocean!
Ingredients
- Beeswax- Can be found from a craft store or ask a local beekeeper!
- Jojoba-(pronounced ho-HO-ba) oil. Jojoba is a desert shrub that grows in northern Mexico and the southwestern US. Oil and wax are produced from the seeds and are typically used in medical products. The oil helps give beeswax wraps a tacky property that mimics plastic wraps.
- Pine Resin- This comes in a powder form and in combination with the jojoba oil makes the wrap sticky. Be very careful as the pine resin is extremely sticky and can ruin clothing, the surface you are working on, and the rug. Supervisor campers closely when handling this ingredient or complete this step of the process while they watch you handle the pine resin!
- Cotton fabric- Cut into squares large enough to wrap sandwiches at camp!
- Cheese grater- This will get clogged with beeswax so dedicate a grater specifically for this project. You may want more than one so multiple campers can participate at once to speed up the process.
- Parchment paper- You will need at least two sheets large enough to completely cover the top and bottom of your cotton fabric square.
- Clothesline- Long enough to hang your drying beeswax wraps!
- Bowl and spoon for mixing- sticky ingredients
- Iron- This might get a coating of beeswax! ALWAYS supervise campers while the iron is hot.
- Towel or ironing board
- Scissors
Directions
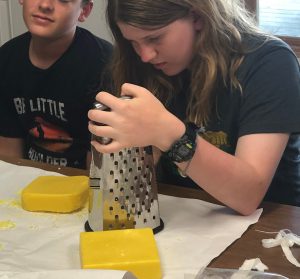
- Grate the block of beeswax wrap into smaller, ironable pieces. This can be time consuming so you may want to get a head-start on grating beeswax.
- To make mix for one wrap in a bowl, bring together roughly:
- 1 cup of grated beeswax
- 1 tablespoon of pine resin very messy, be careful!
- 1 teaspoon of jojoba oil
- Cut fabric pieces to the size you would like your wrap to be. Make sure it is large enough to wrap around your sandwich!
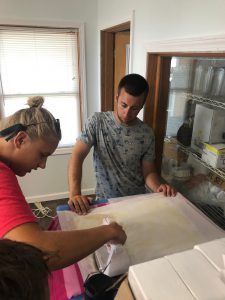
- On an ironing board (or a towel on top of a table), place the first sheet of parchment paper with your fabric piece on it. Make sure the parchment paper is larger than the cloth fabric to avoid spilling hot beeswax!

- Sprinkle the mixed beeswax, jojoba oil, and pine resin on your piece of fabric. You do not need to cover each space with wax. Once you iron the wax and it begins to melt, you will be able to gauge how much or how little you really need.
- Place the second piece of parchment paper on top of your cloth fabric.
- Plug iron in and place on lowest heat setting. If completing this inside, make sure you have a fan to avoid excess smoke.
- Start to iron over the parchment paper. Make sure each part of the cloth is saturated with beeswax. Dealing with an iron and hot wax may be difficult for some campers. Be careful!

**Just like in diving, having a buddy is helpful!
9. Once you have saturated the fabric in beeswax, turn the iron off and set it in a safe place. Quickly remove the fabric cloth from the parchment paper by peeling the parchment paper from the beeswax wrap. Careful the wax may still be hot! Wait to touch until hot, liquid wax has solidified BUT do not wait too long as the parchment paper may get stuck on the wrap!
10. Drape your wrap on a clothesline for a few hours in order for it to completely dry.
11. Enjoy your wrap multiple times! Wash only with cold water and DO NOT microwave your wrap!
